A new Unreal 4 Marketplace Asset is under review and will be released shortly!
all
How to edit Blueprint USTRUCTS() in Unreal Engine
Before attempting ANY of this, PLEASE READ THE FOLLOWING!!
- I take NO RESPONSIBILITY if You or Unreal Engine mess up when editing a Blueprint USTRUCT().
- Make sure you BACKUP your project BEFORE doing ANY USTRUCT() work in Unreal Engine 4.
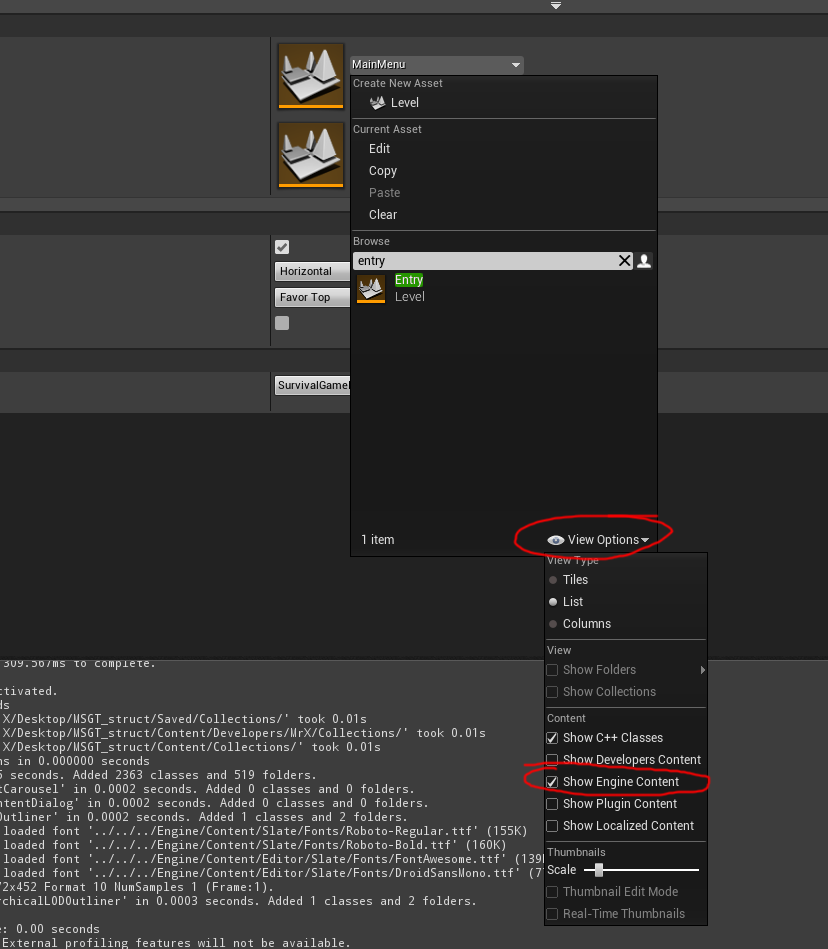
First of all, open your “Project Settings” and select the “Entry” map as the “Editor Startup Map“, you need to click “View Options” at the bottom and select “Show Engine Content” for the Entry map to show up. This is so the engine loads up without any references to anything other than the engine core.
In your Editor Preferences, disable Auto Saving (at least when editing a Struct)
RESTART THE EDITOR AFTER YOU’VE SELECTED THE MAP & DISABLED AUTO SAVING
Add your new Struct Variable
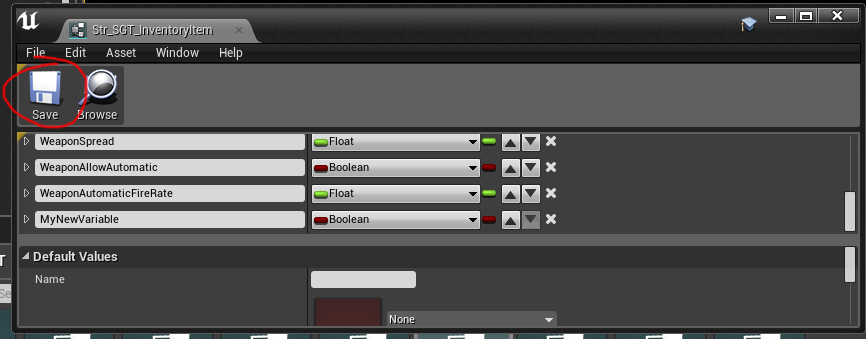
When you’re done editing the struct, click “SAVE” inside the Struct editor, DO NOT CLICK SAVE ALL!!!!
THIS IS THE THE MOST CRUCIAL PART!!!
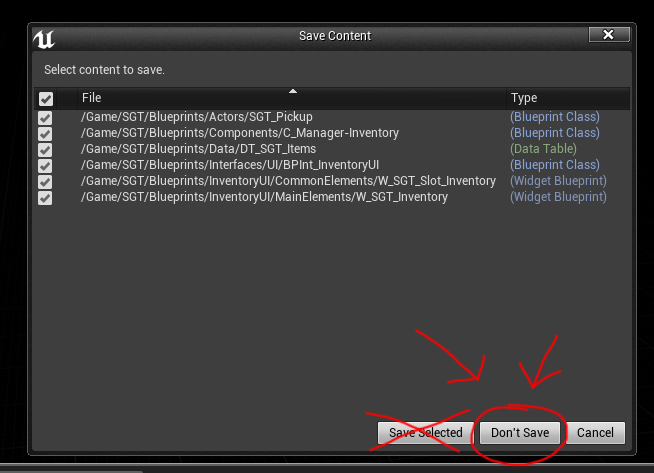
CLOSE THE EDITOR & DO NOT CLICK ON SAVE SELECTED!!!
Click on “Don’t Save” and Restart your Editor!! Don’t save or touch ANYTHING else.
Using this method, you’ll keep all the Struct references intact and can edit Blueprint USTRUCTs however you like, without making a mess, IF you make a mess, you’ll have to Replace ALL references to that Struct in every blueprint and every function that has a reference to it.
Happy USTRUCT editing 😉
Integrating Simple Build System with Multiplayer Survival Game Template
Assets required for integration
- https://www.unrealengine.com/marketplace/simple-building-system
- https://www.unrealengine.com/marketplace/survival-game-template
Before you begin, please read the following!
- START BY BACKING UP YOUR PROJECT BEFORE MIGRATING, I take NO responsibility if You or Unreal Engine mess up the Migration/Integration process.
- The Multiplayer Survival Template doesn’t have a default definition of Resources such as Wood or Stone, therefor, if you want to enable the feature of removing resources from the Player’s inventory, you’ll need to edit the Str_SGT_InventoryItem struct, I will cover this process in a separate tutorial, reason being, it can mess up A LOT of references to the struct & the DT_SGT_Items DataTable, making your entire project a nightmare to fix. DO NOT ATTEMPT THIS UNLESS YOU KNOW WHAT YOU’RE DOING
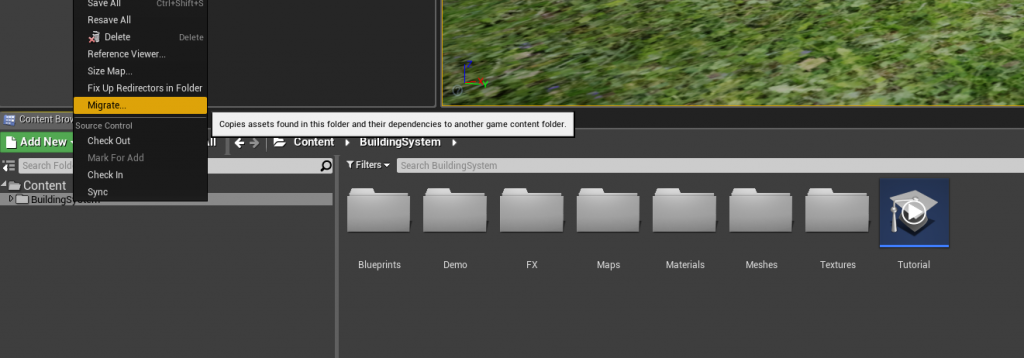
Begin by Migrating the Simple Building System to your MSGT Installation
Open up the SurvivalController Blueprint (/SGT/Blueprints/Game/SurvivalController)
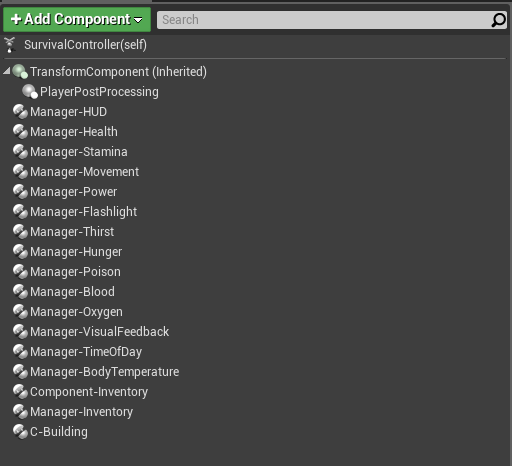
Add the C-Building Component to the SurvivalController Blueprint
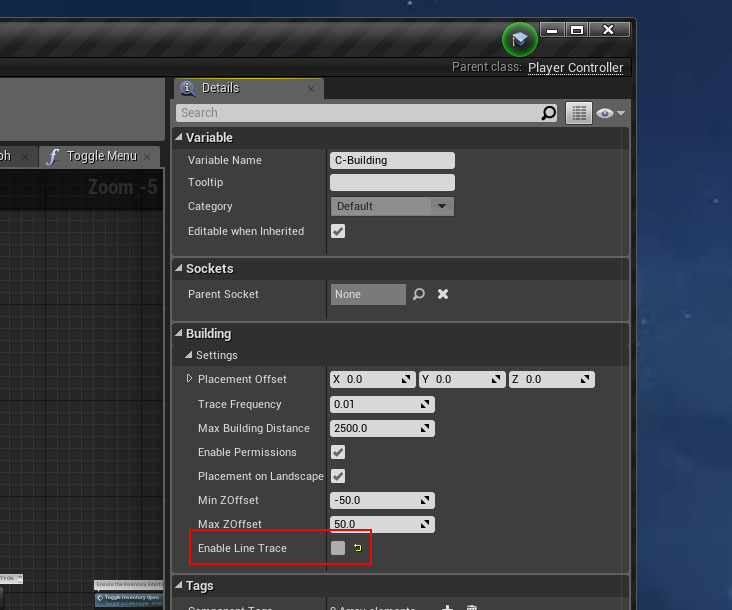
Select the C-Building component in the SurvivalController Blueprint (where you just added the Component), on the right hand side, in the Details panel, UNCHECK/Disable the “Enable Line Trace”
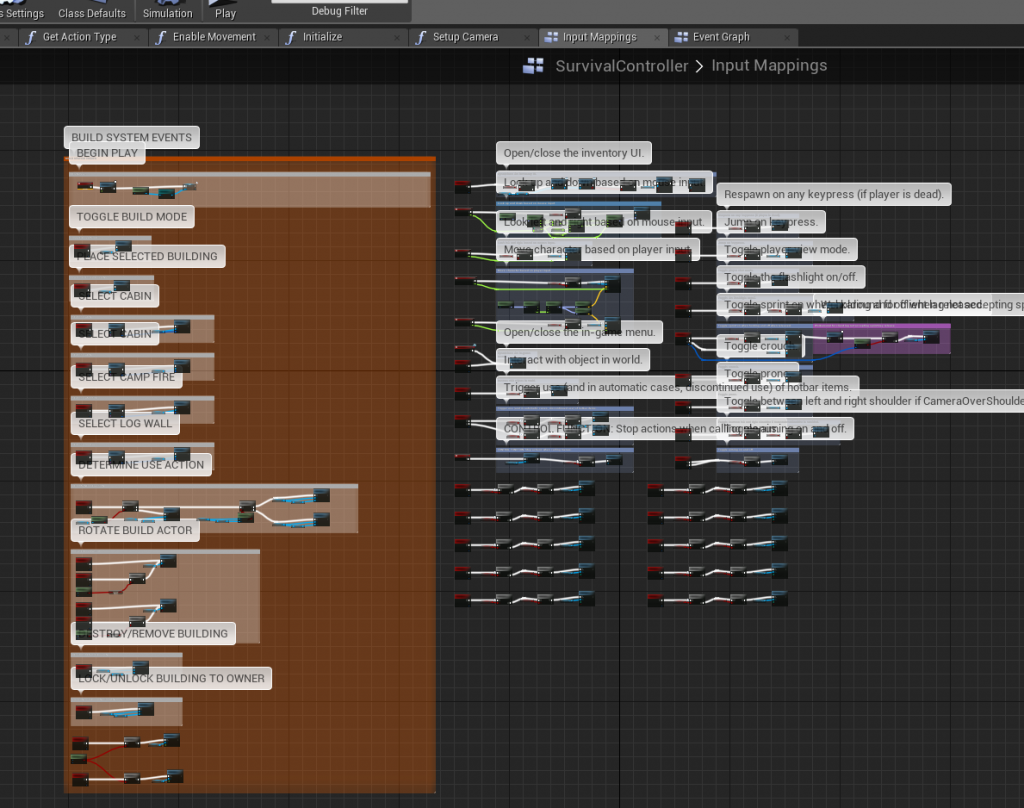
Copy the Events from (/BuildingSystem/Blueprints/BP_PlayerController) to your SurvivalController
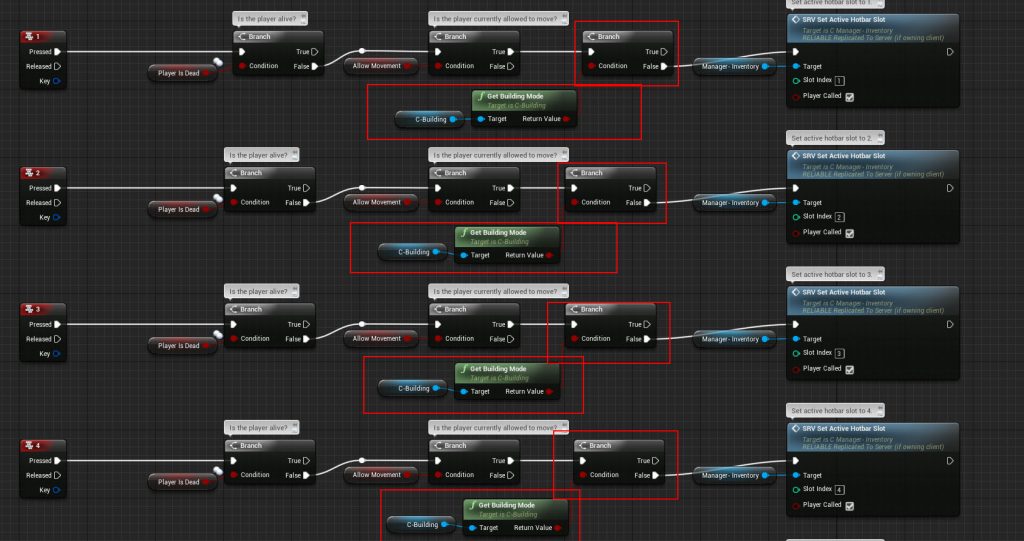
In the SurvivalController Blueprint, add the Branch checks shown below, to make sure we’re not in Building mode when using the number keys.
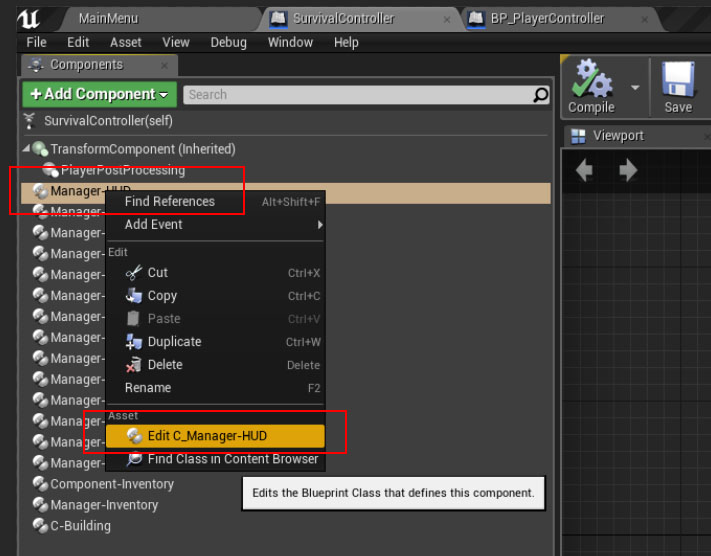
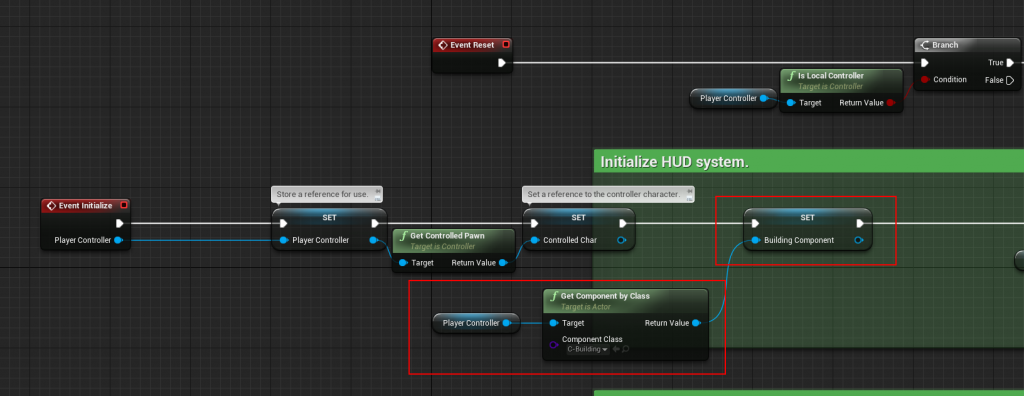
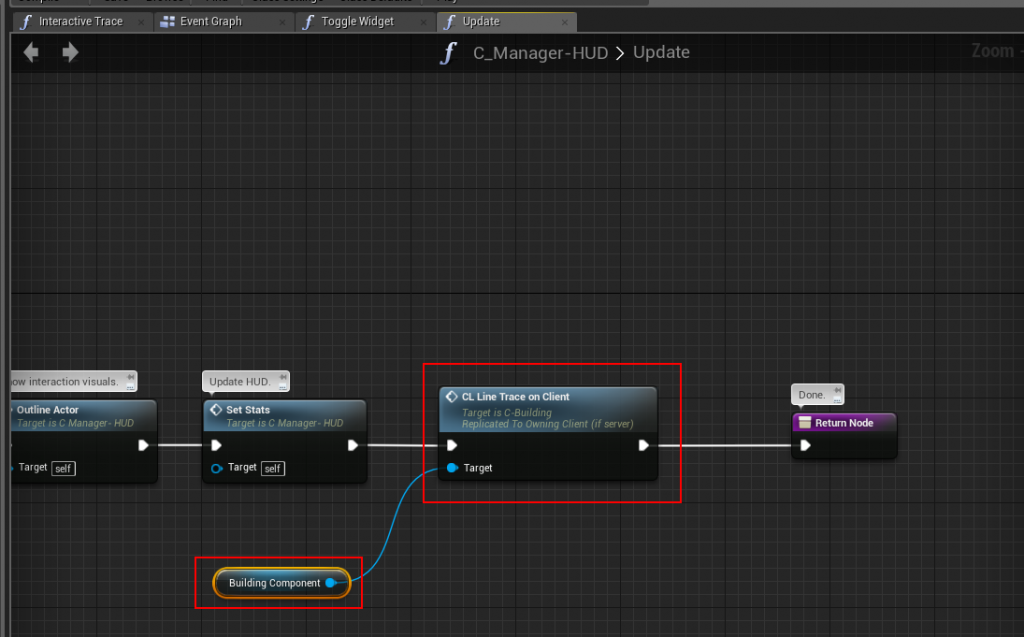
Open the Manager-HUD component Blueprint, add a reference to the Building Component as Shown below
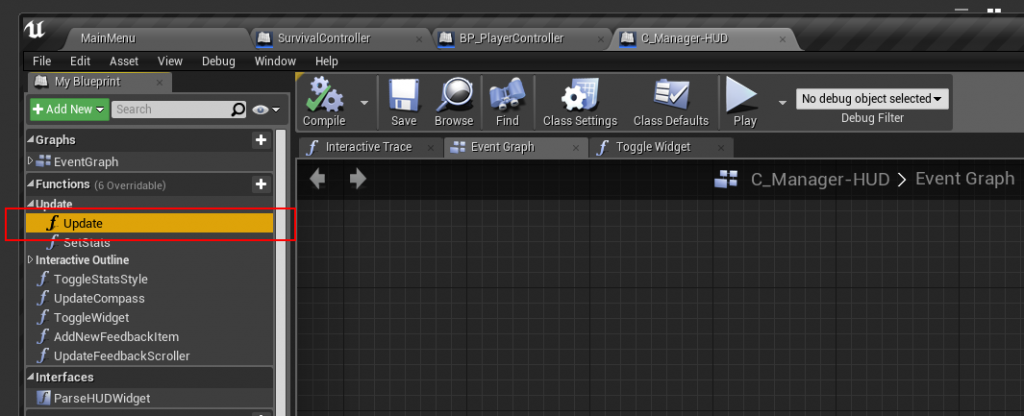
In the Manager-HUD Component, open the function “Update” and use the Reference you just created “Building Component” to call the function “CL Line Trace on Client”.
That’s it!
Step 2 of the Integration process can be found here:
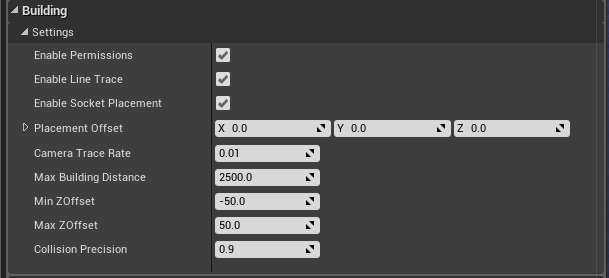
Simple Build System Settings
Simple Build system Settings Explained.
- Enable Permissions
If you want to enable the Permissions system, otherwise the system will not check Ownership of buildings - Placement Offset
This is an offset used for building placement, when you spawn the build actor into the world it will inherit this offset, there are also in game functions to adjust the Z value of this offset (up and down)
- Enable Socket Placement
If you want to enable the sockets placement system - Trace Frequency
This is how often the LineTrace will run, increase this value if, for whatever reason, you run into performance issues - Max Building Distance
How far the player can build away from the Player’s character (or view) - Min ZOffset
Minimum Z offset you can lower the “Placement Offset” to. - Min ZOffset
Maximum Z offset you can increase the “Placement Offset” to. - Enable Line Trace
You can disable the built in LineTrace timer if you are using a different/your own line trace. - Collision Precision
How precise do you want the collision check to be when placing down buildings (if colliding with another building)
1.0 = 1:1 scale of the building mesh (lower number is less precise)
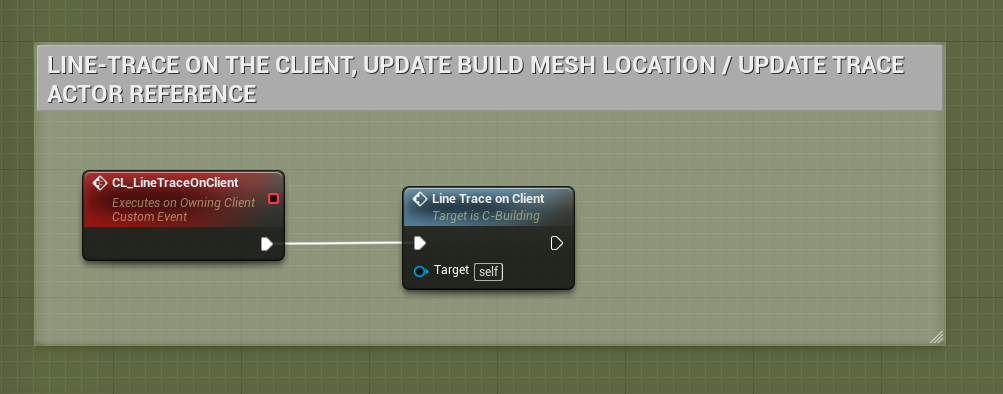
If you disable “Enable Line Trace”, be sure to call this event in your own Tick/Looping event/function. “CL_LineTraceOnClient”
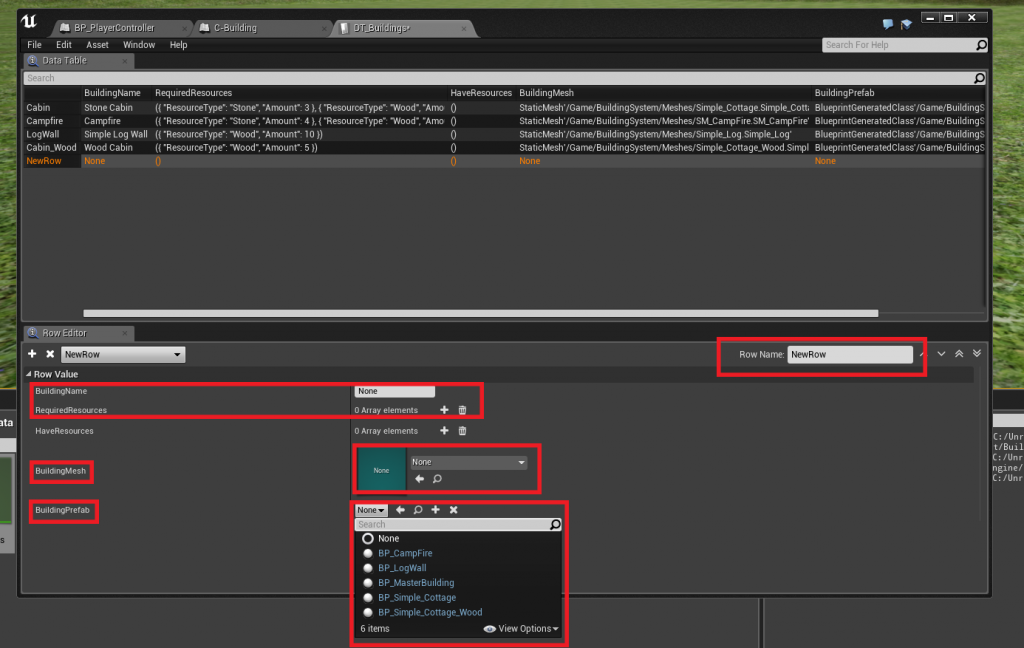
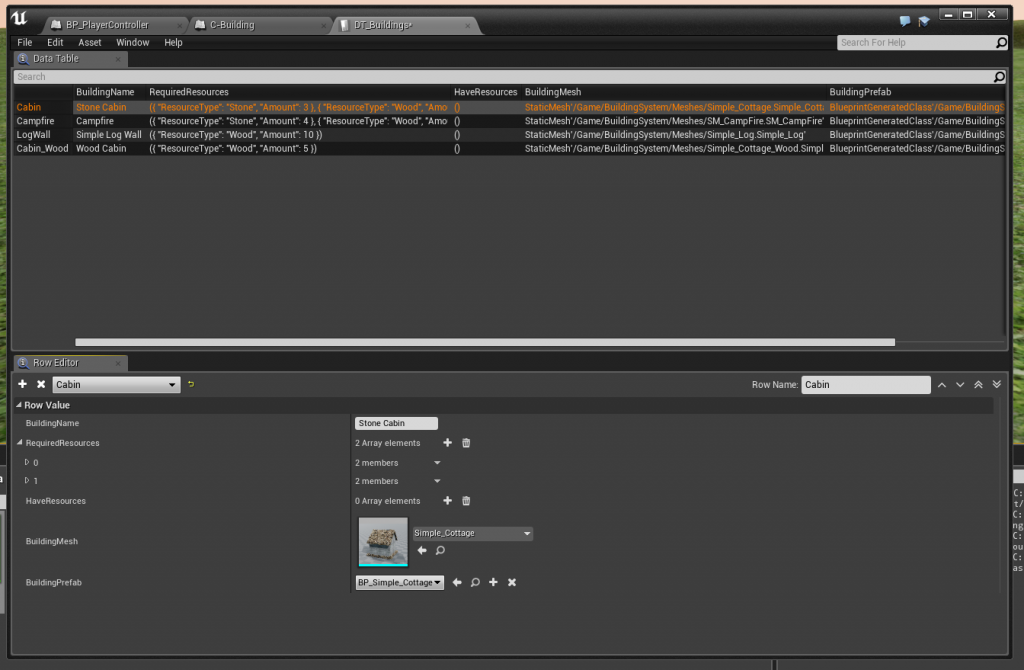
Simple Build System Adding a new Building
What you need before continuing:
- You must have imported your building Mesh that you want to use


