Requirements
- A working Unreal Engine Dedicated Server, see the Unreal Engine Documentation on how to set this up
- Own a copy of the GameLiftServer Plugin
- Move the AwsGameLiftServer plugin folder to YourProject\Plugins
Initializing a GameLift Server
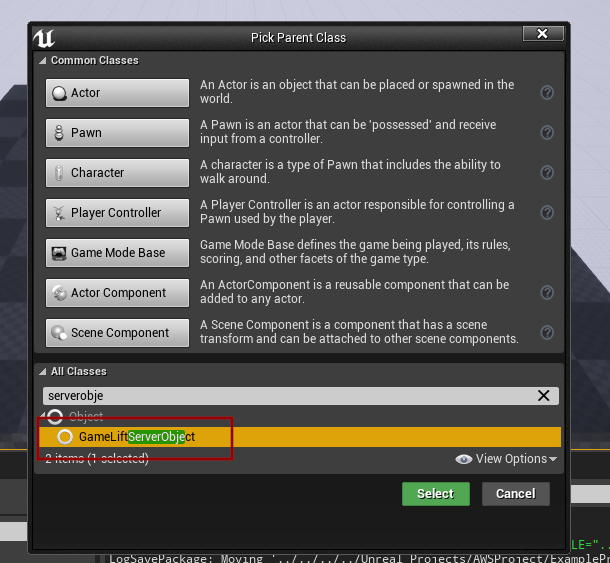
We must first create a Server Object, this can be done via blueprint or native c++. If you want the ability to override Gamelift server events, you can create a new child class of parent type “GameLiftServerObject” (see example image below)
Overridable functions (optional)

Constructing the Server Object
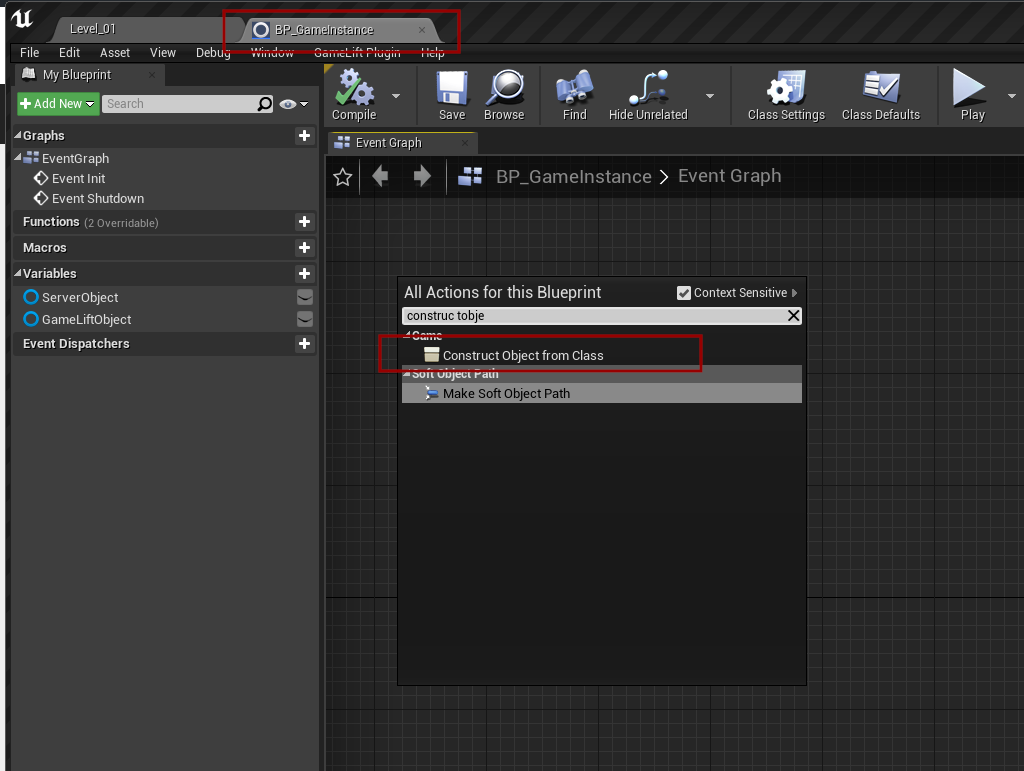
We’re going to construct & initialize our game server inside our GameInstance blueprint. Search for “Construct object from class” in the context window.
Initializing the server
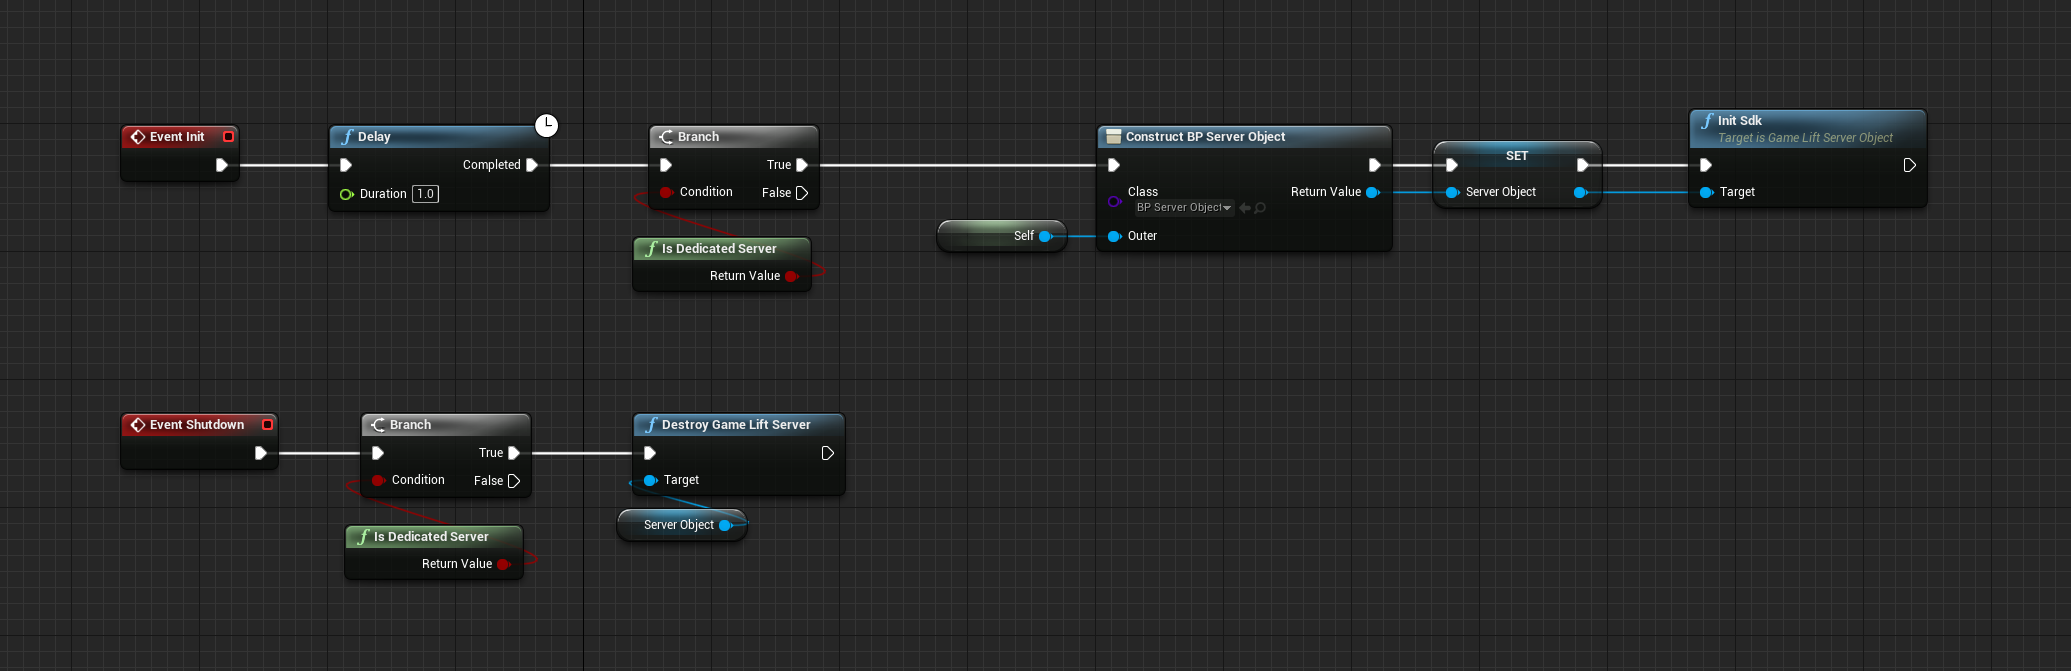
Implement the two events inside our GameInstance, called Init and Shutdown. Implement the Initialization as demonstrated below.
When the game instance is constructed the GameServer will start talking with GameLift and wait for events from AWS GameLift Servers.
Note: Calling the InitSDK in a non-server environment will do nothing, it’s been disabled and will only run on dedicated servers.
Accepting Player Sessions (Optional)
The AWSCore::GameLiftServer plugin comes with a GameMode that you can use to make it easier to Accept player sessions, it has a overridable blueprint event called “PreLogin” that you can use to grab PlayerIds from.
Reparent your GameMode blueprint to GameLiftServerGameMode
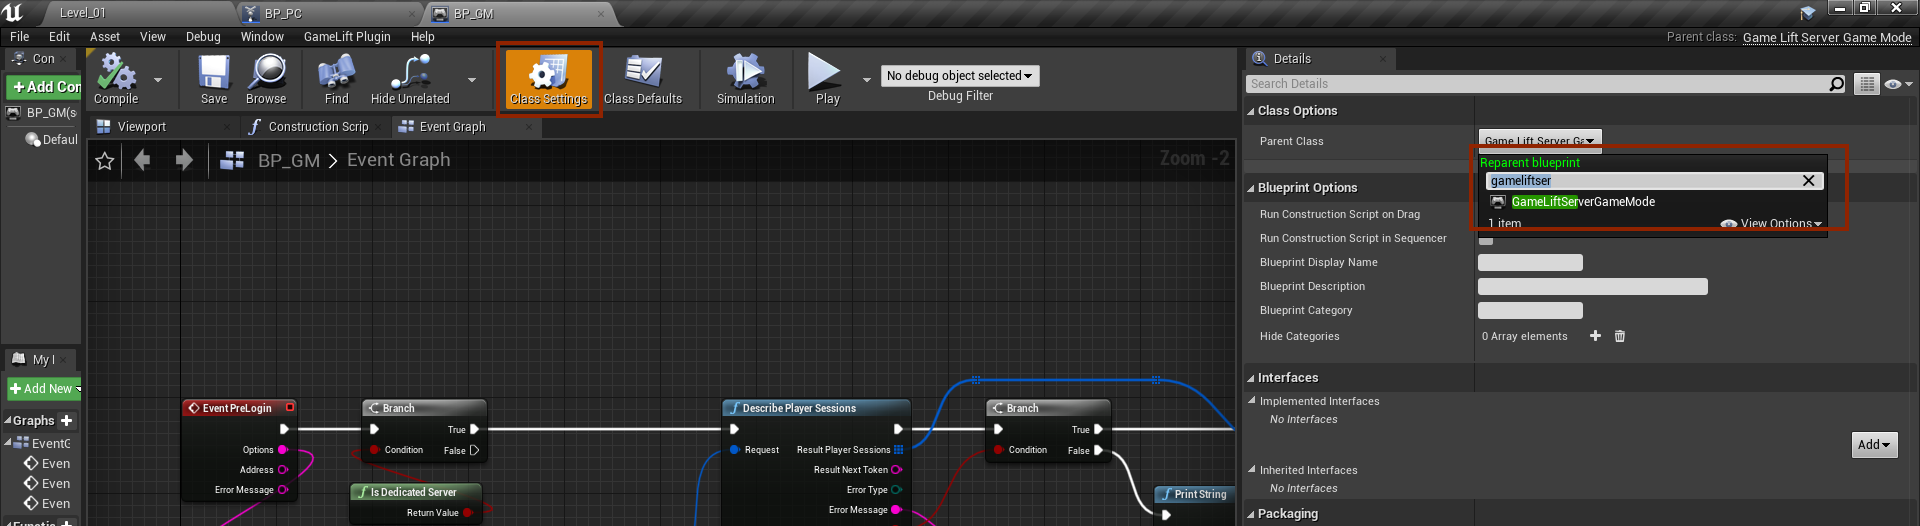
How to accept player sessions using the PreLoginEvent

How to include PlayerId when connecting
You can send your PlayerId to the server by appending it to your Options string, this will make it available to the server when connecting and using it in the example above.

Custom Listen Port
You can run your Server.exe executable with the -Port=XXXX to have both GameLift and your GameServer to listen on an alternative port.