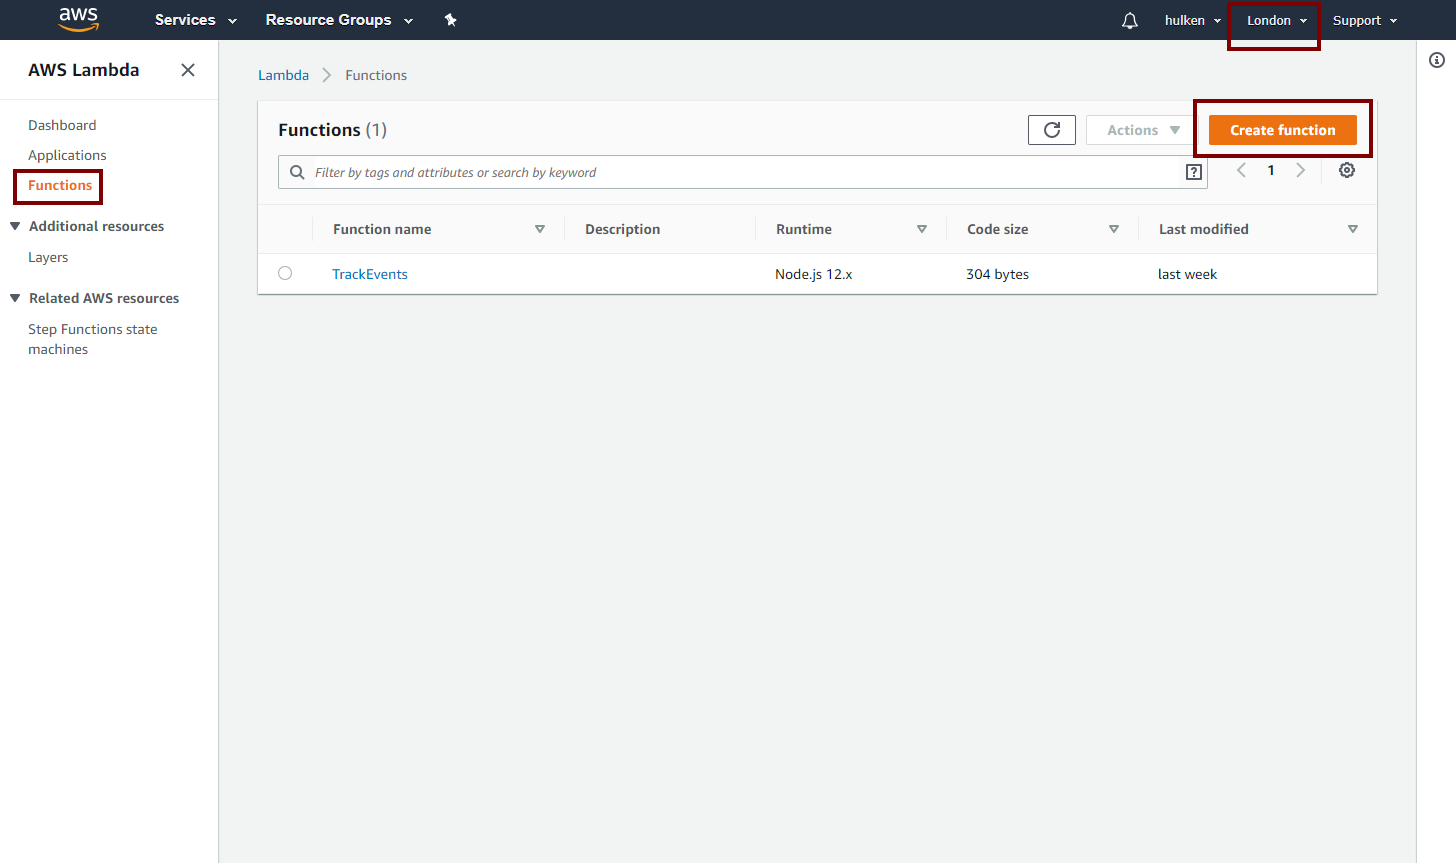
Go to https://console.aws.amazon.com/iam/ and login to your Amazon Account and access the IAM Console
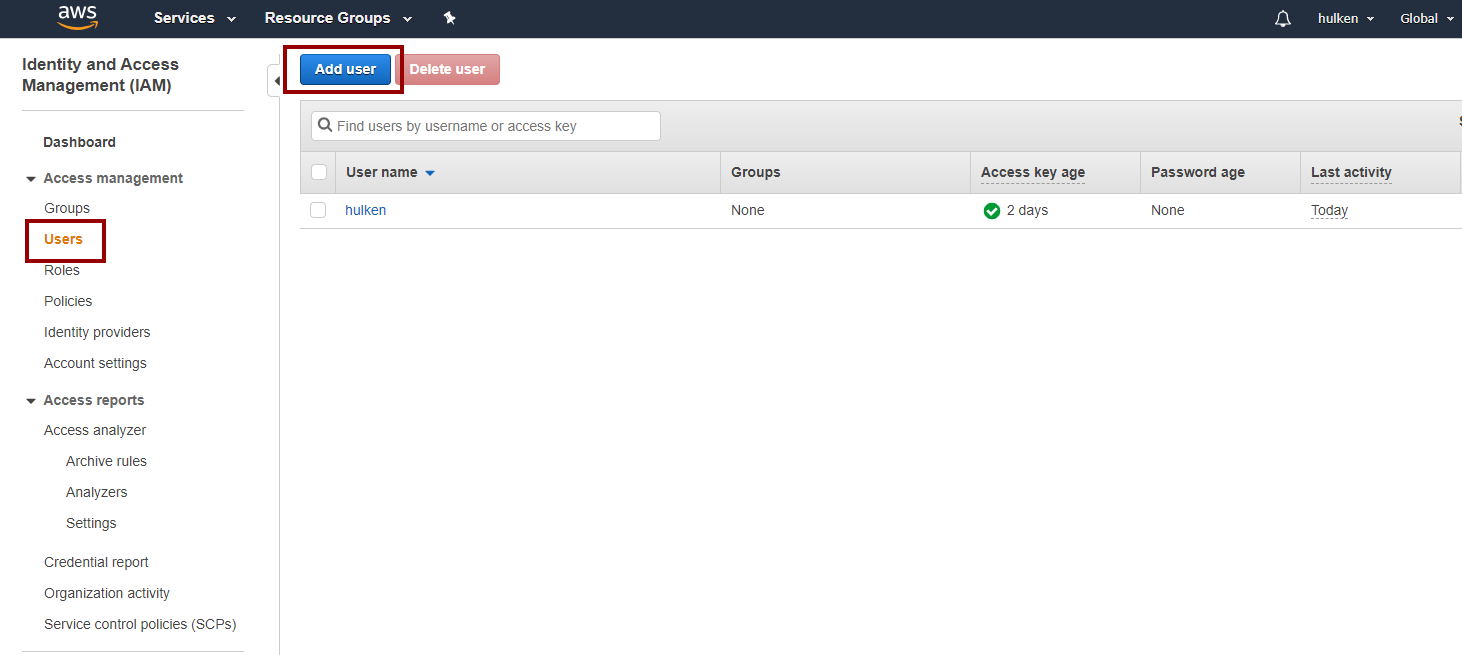
Click on “Users” and then “Add User“
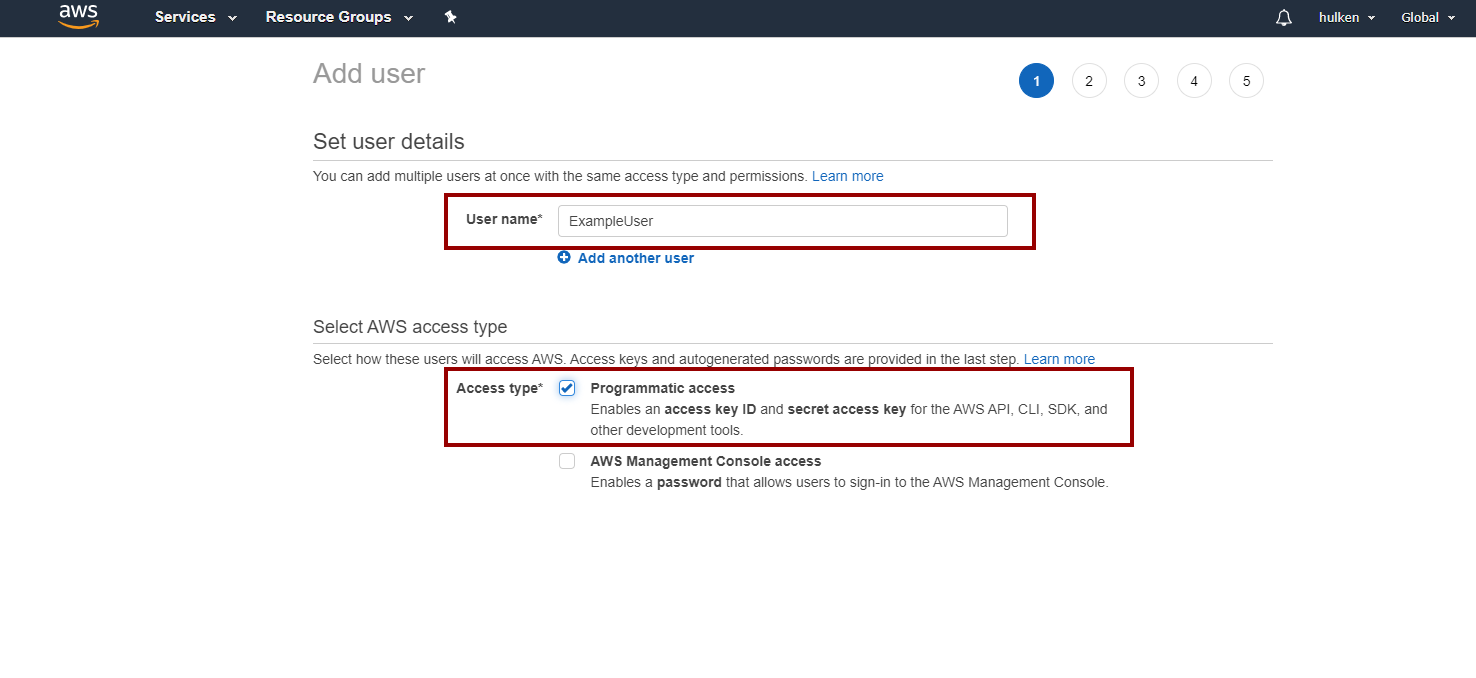
Name your user user and check “Programmatic Access“
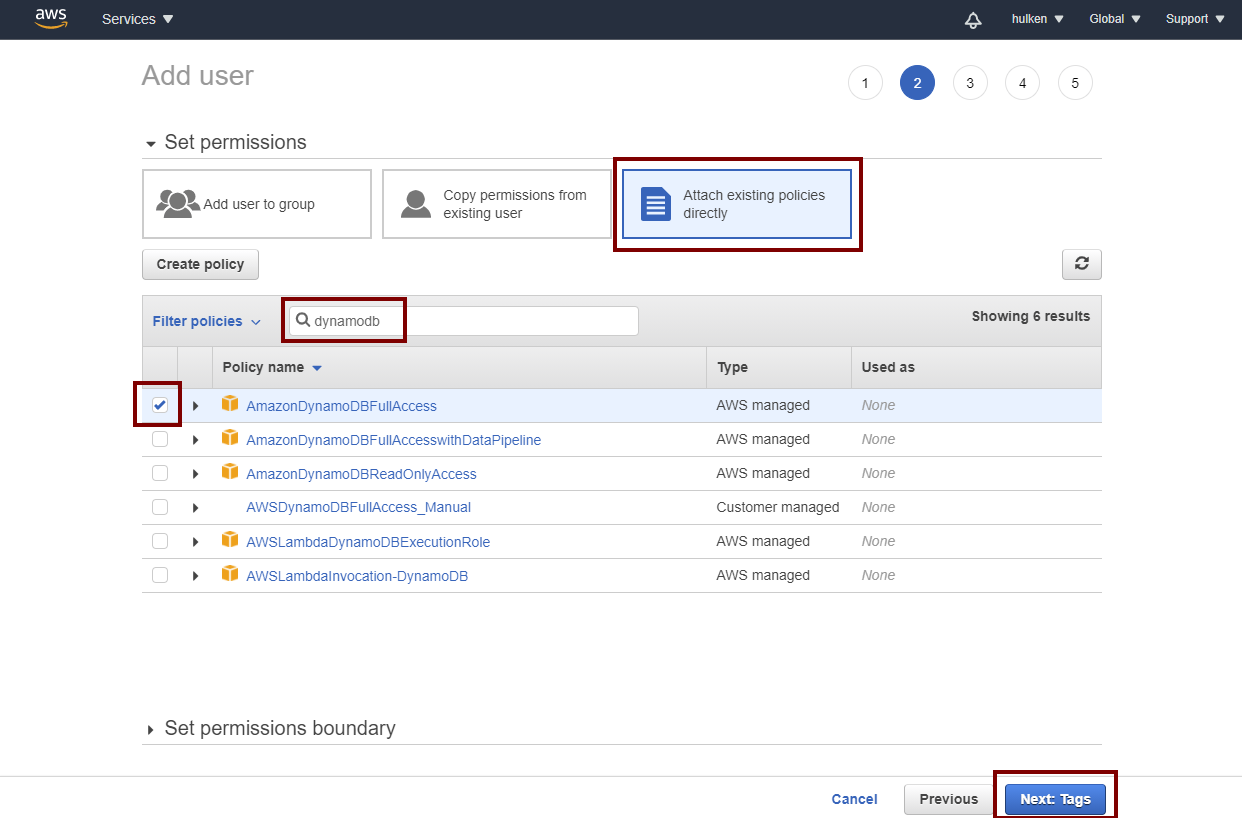
On the next screen click on “Attach existing policies directly” and search for DynamoDBFullAccess
You can skip the “Tags” page
Verify your settings and click on “Create User“

These are the security keys that you will have to enter in Unreal Engine to access DynamoDB functionality!