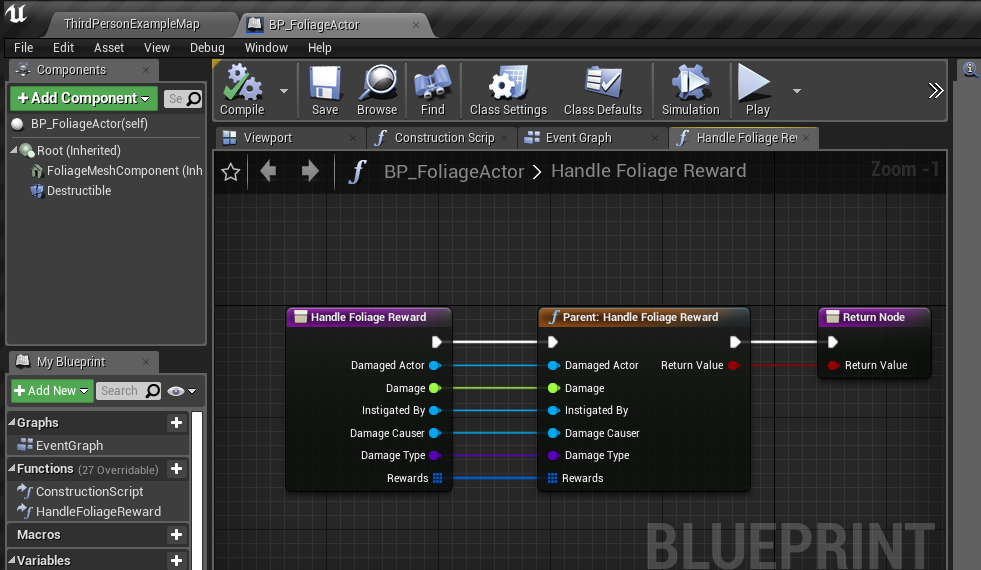
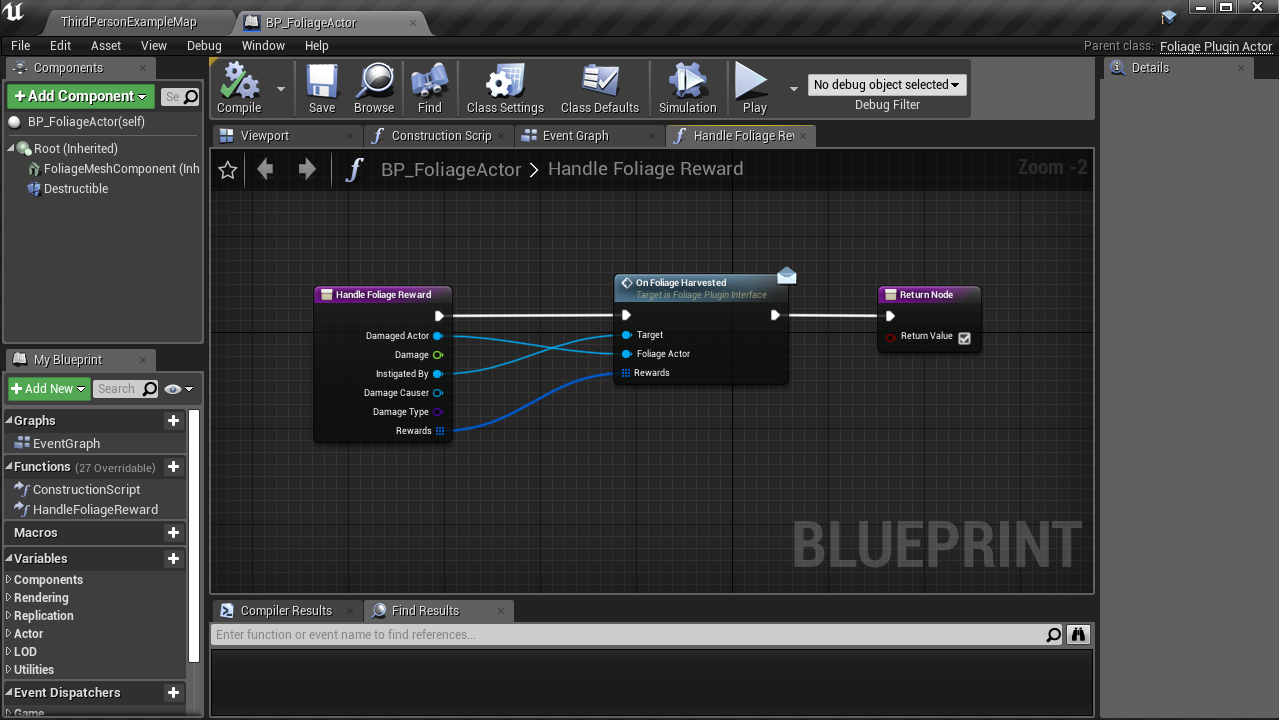
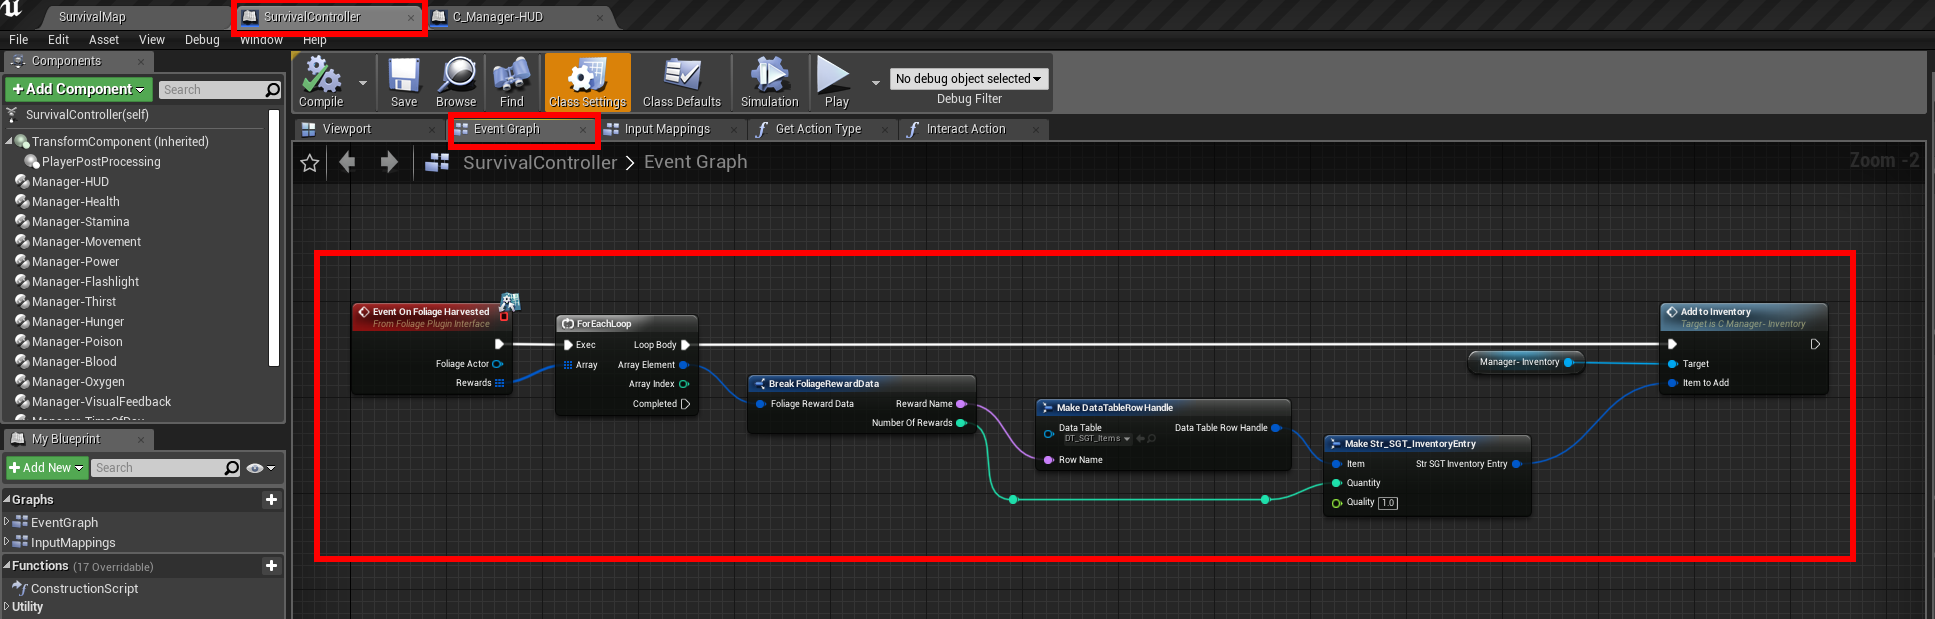
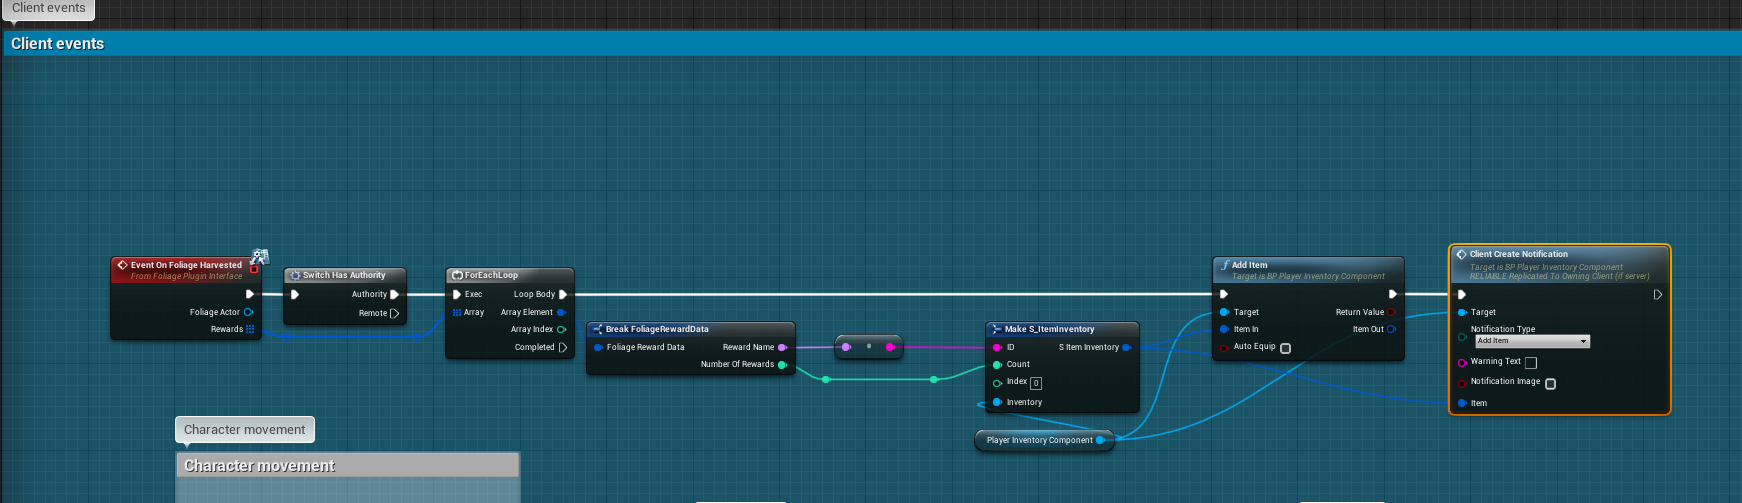
Changed the HandleFoliageReward function signature inside the FoligeActor that can be overriden to implement custom logic for handling the reward data.
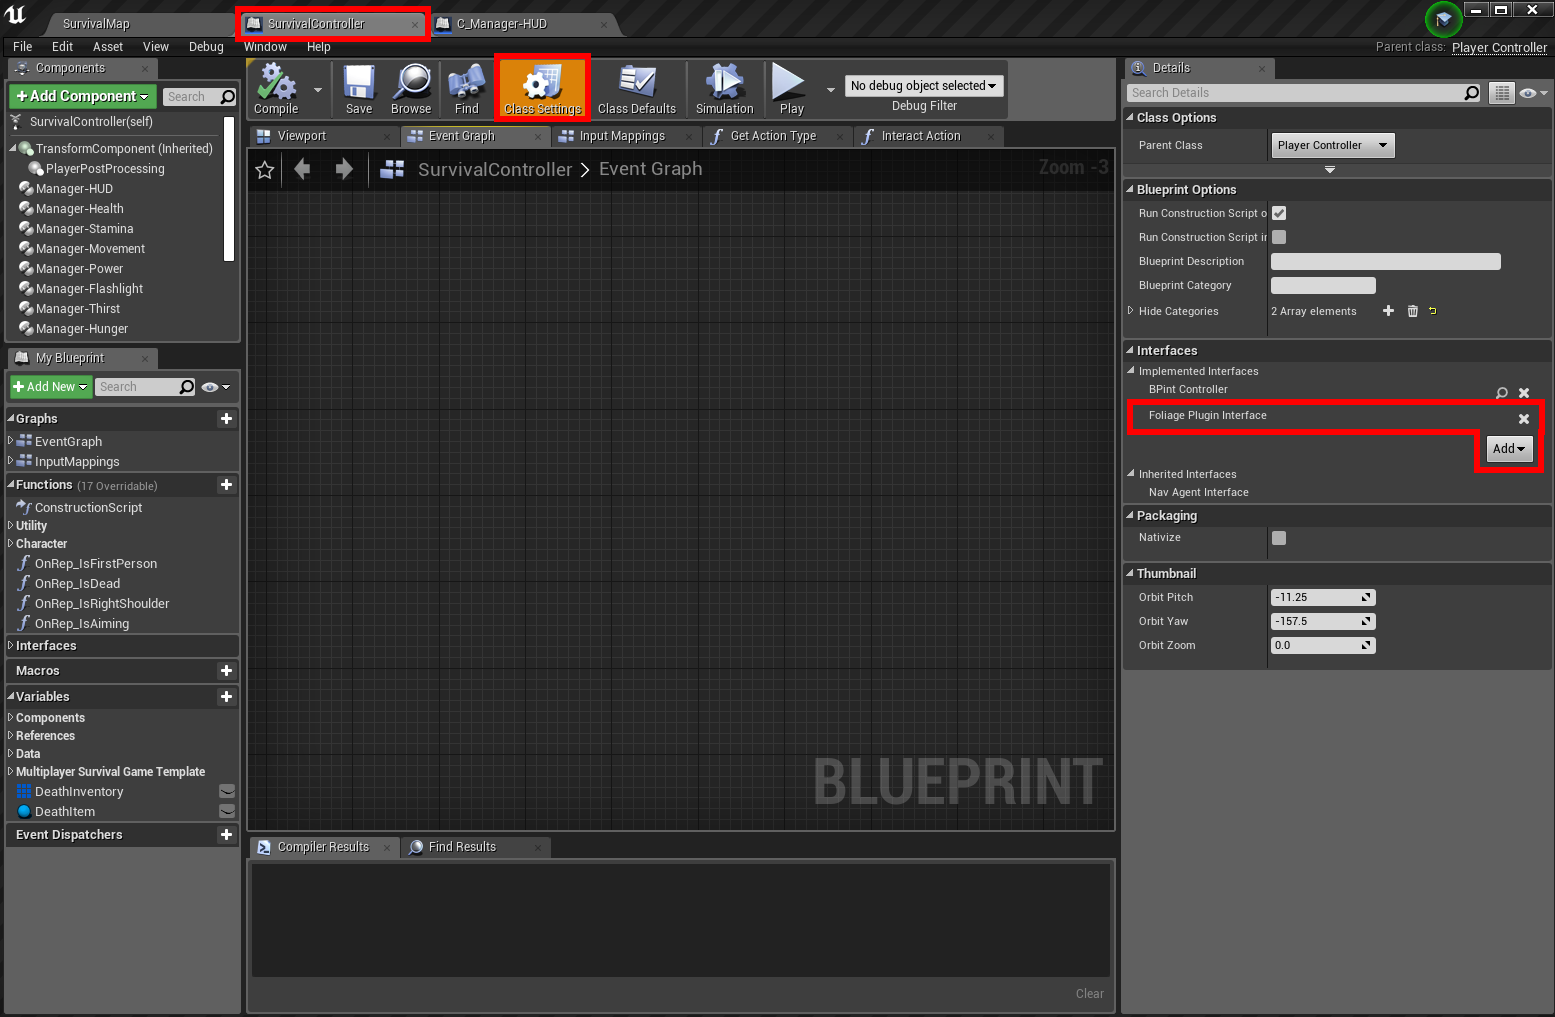
Changed FoligeRewardData struct to BlueprintReadWrite to enable modifying the reward data in blueprint overridable events.
OnFoliageHarveted interface fucntion is now BlueprintCallable
Optimized Replication using FastArraySerializer
Fixed an issue where the blocking object types didn’t always block respawns / despawns