What is VivoxCore?
The VivoxCore plugin is a blueprint wrapper plugin for Unreal Engine 4, it exposes the Vivox Plugin that is shipped with UE4 to blueprints for easy use.

Purchase
Additional Information
Getting Started
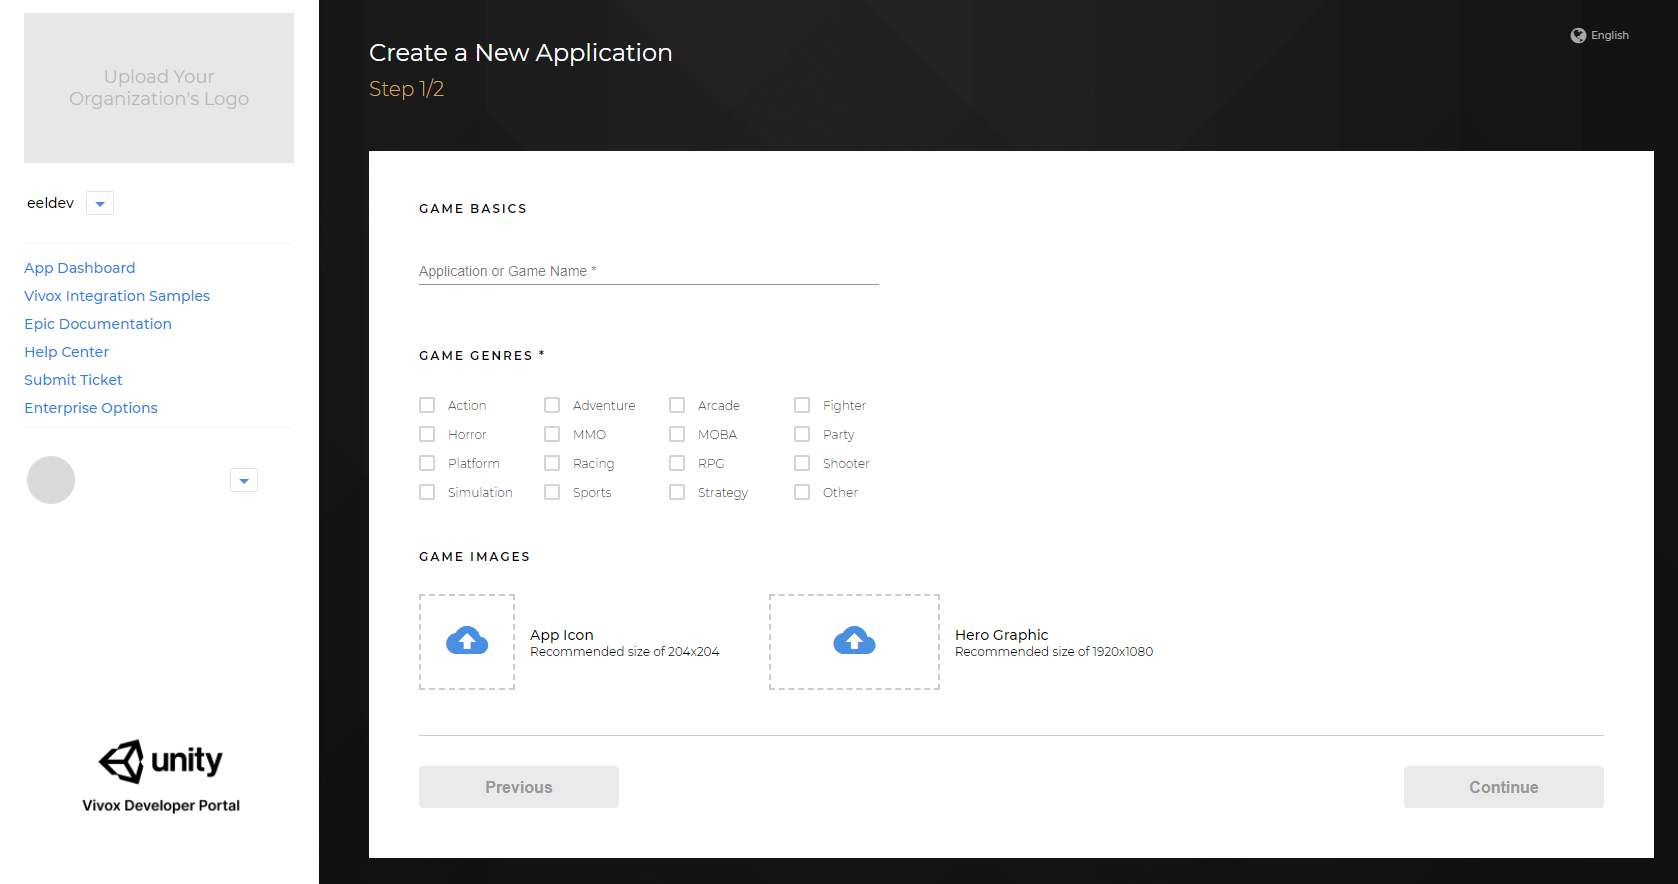
- After creating your Application, you will receive your application keys that we will use in our Unreal Engine 4 project to initialize the Plugin.
- Use the API End-Point & Domain displayed below in your project

Configuring VivoxCore

DefaultEngine.ini
Edit your Project\Config\DefaultEngine.ini configuration file and Apply the settings for your Application
[VoiceChat.Vivox]
bEnabled=true
ServerUrl="https://ue4mt1s.www.vivox.com/api2"
Domain="ue4mt1s.vivox.com"
Issuer="eeldev7508-"
InsecureSecret="muc4"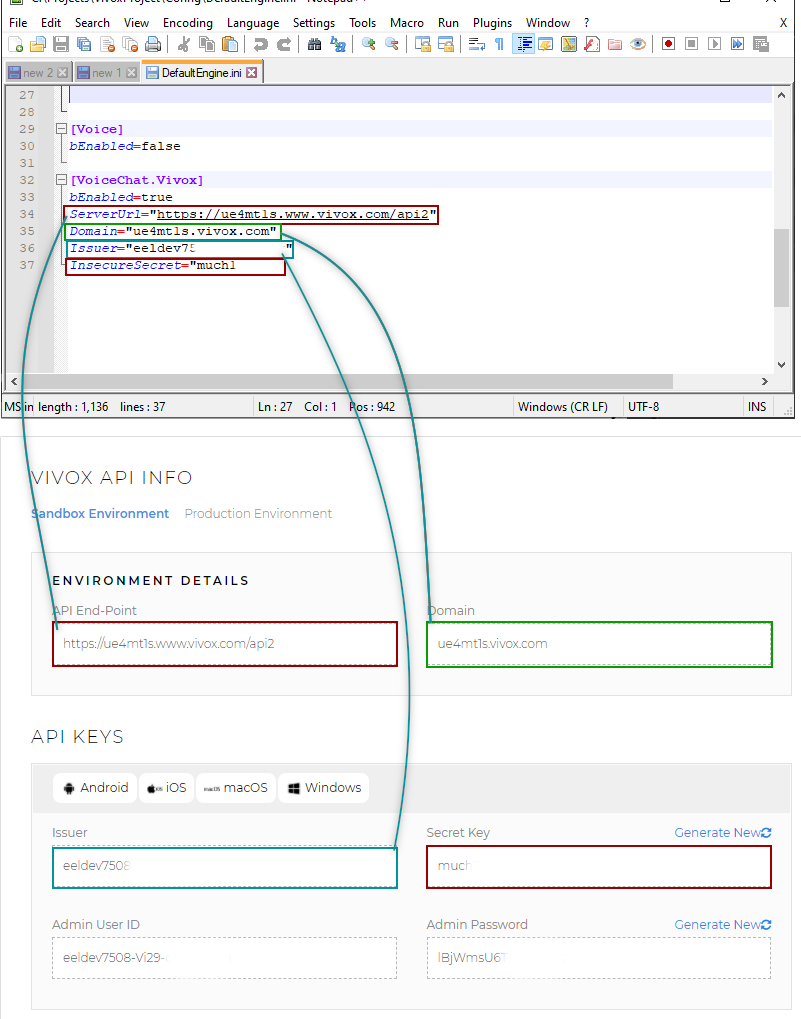
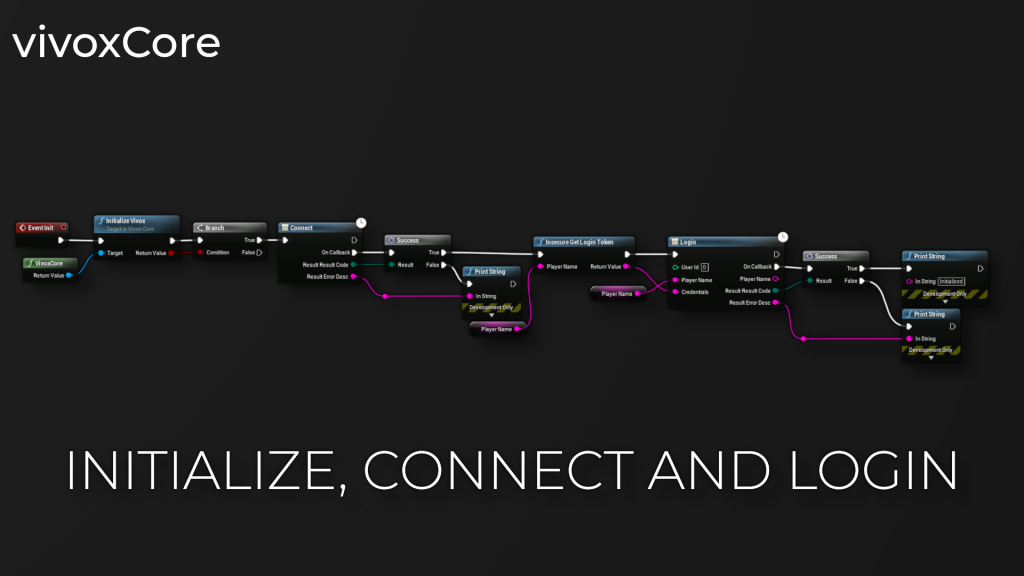
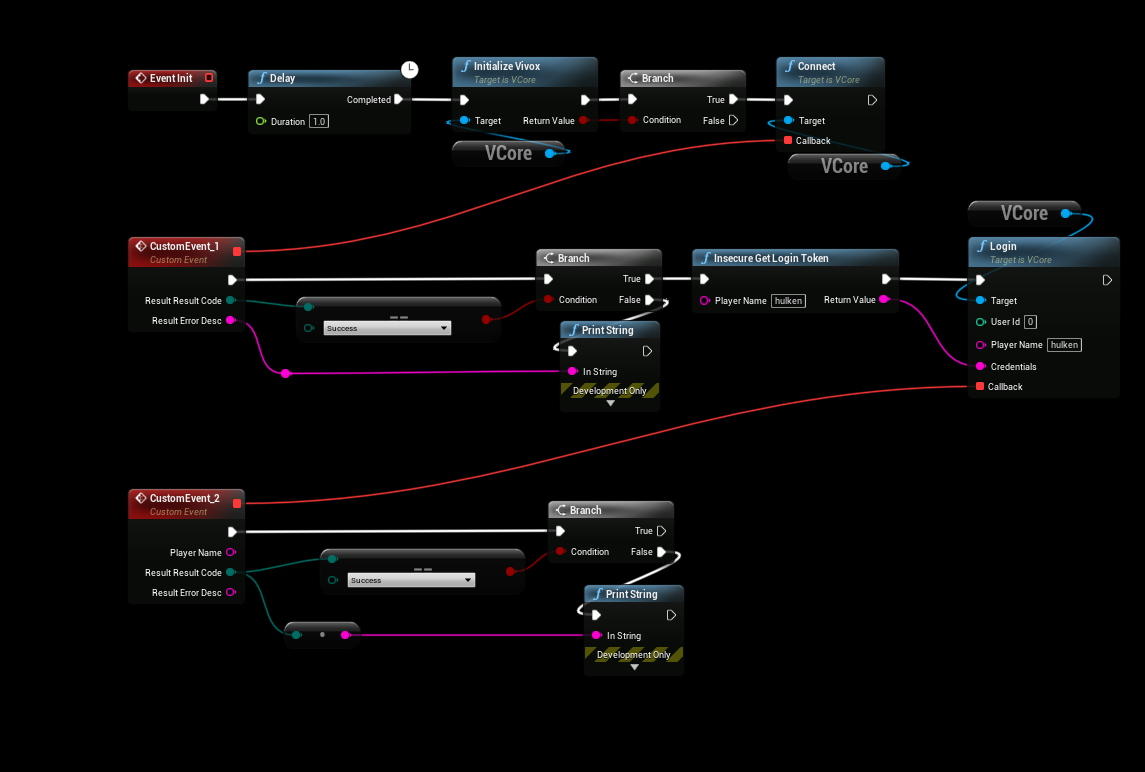
Initializing VivoxCore
We’re going to be using our GameInstance to Initialize VivoxCore in this example, we’re also going to be using the Async nodes (Connect&Login), you can use the traditional Connect/Login nodes, choose your preference.
Example 1

Example 2
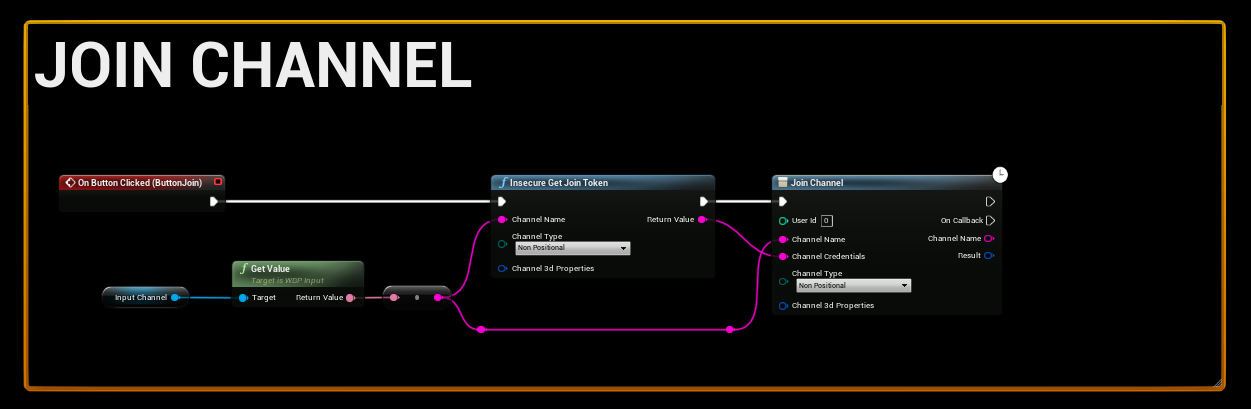
Joining a Voice Channel
Joining a channel is super easy, in this example we generate a “insecure join token” and join our channel of choice, see the example below:
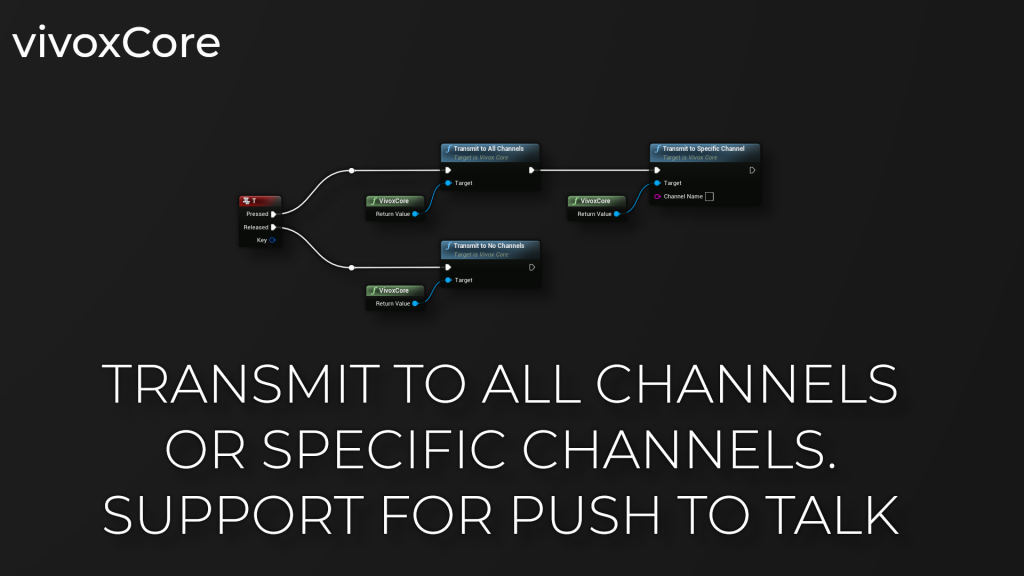
Transmitting Voice
Transmitting voice is very simple, all you have to do is invoke any of the “Transmit” functions, you can transmit to All channels or specific channels.
When you want to stop transmitting Voice, you invoke “TransmitToNoChannels”.