The ChunkCore plugin is a Blueprint wrapper for the ChunkDownloader Plugin
ChunkDownloader is a patching solution for Unreal Engine. It downloads assets from a remote service and mounts them in memory for use in your games, enabling you to provide updates and assets with ease.
Requirements
- Unreal Engine 4.26+
- ChunkCore Plugin
- Web Server/CDN or somewhere to host your .pak files
Useful Information
- Official Documentation
- ChunkDownloader Explained on Youtube
- Example Project
- Playable Example Project
- Manifest Updater Application
Purchase Plugin
Getting Started
Open your Project Settings, navigate to Project > Packaging, then make sure that Use Pak File and Generate Chunks are both enabled.

DefaultGame.ini
Edit your Project\Config\DefaultGame.ini file and add the following lines, making sure to customize them to fit your own needs:
The Plugin will try and download your .pak files from this location, in this example: https://eeldev.com/MyGame
[/Script/Plugins.ChunkDownloader]
+CdnBaseUrls=eeldev.com/MyGame
Initializing ChunkCore
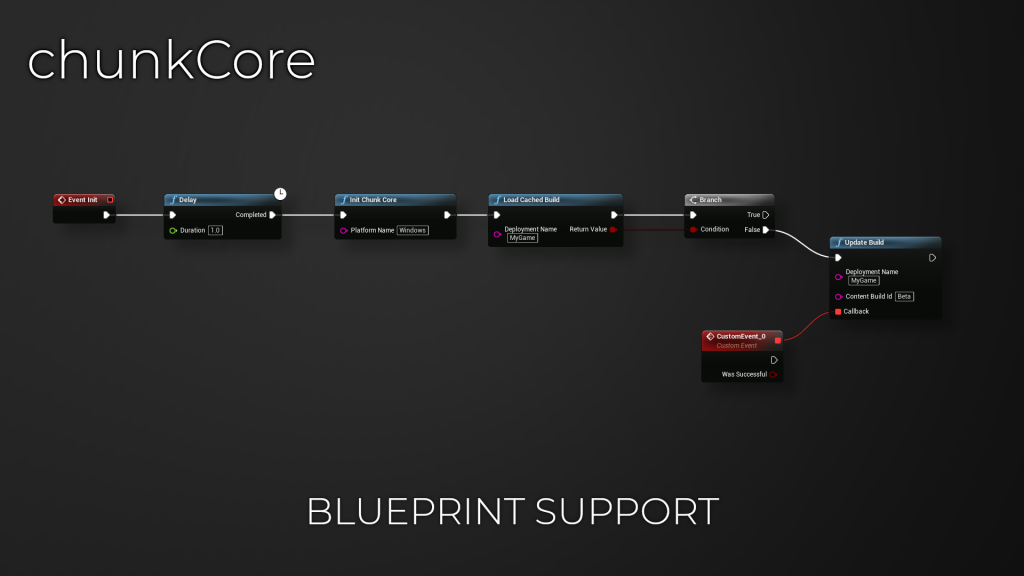
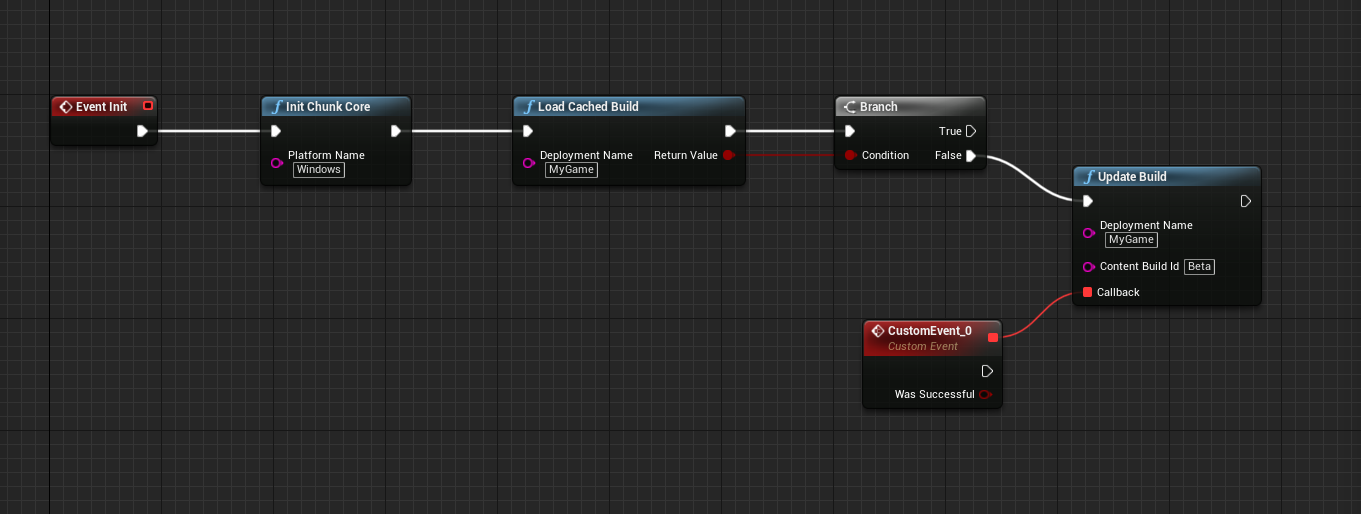
In this example we’re going to initialize using the “Windows” platform name and “MyGame” as our Deployment Name, we’re going to call this Build ID “Beta“
This means that the full path the plugin will use to find our .pak files will be:
eeldev.com/MyGame/Beta/Windows/file.pak
Dividing up your assets into .Pak files
Unreal Engine makes it really easy to divide your assets up into multiple .pak files, all you have to do is create a PrimaryAssetLabel file inside the directory that you want to separate from the main .pak file.
Right click inside your Content Browser -> Misc -> Data Asset
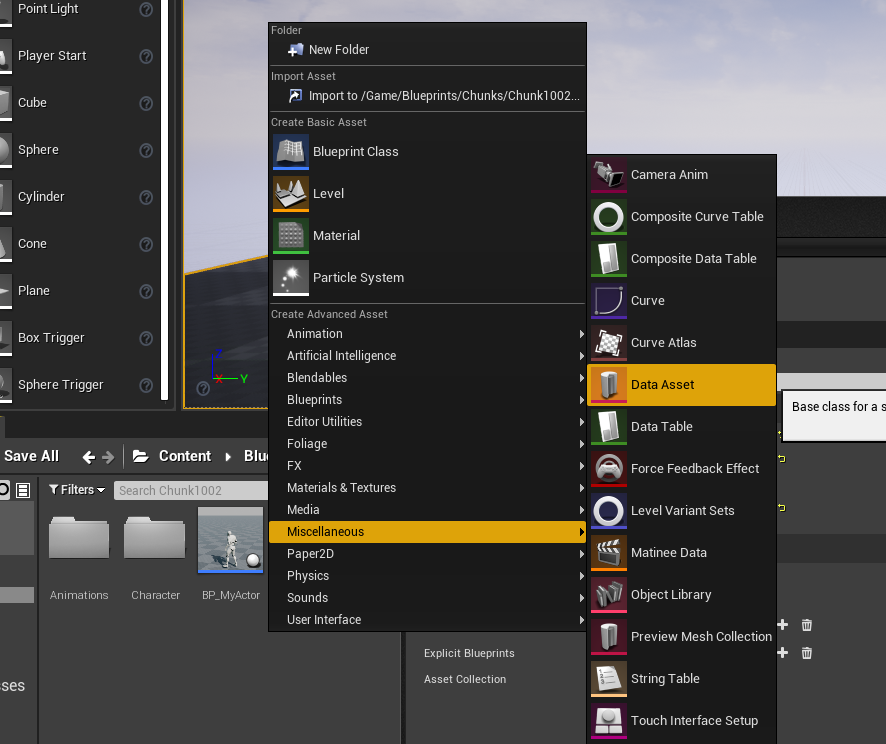
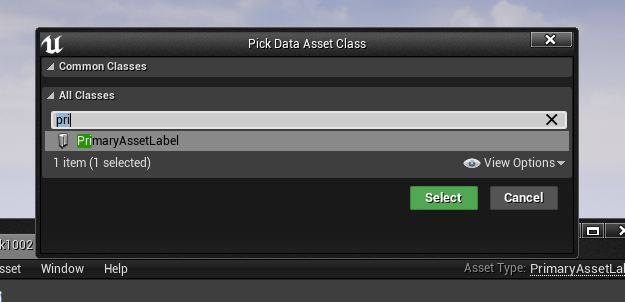
Select the PrimaryAssetLabel type
In this example, ALL files and Folders that are in the same Folder as the Chunk1002 file will be packaged into it’s own .pak file and can be downloaded & loaded into memory by the ChunkCore Plugin!

The Manifest File
To create the Manifest file needed for the plugin to know what files to download, we must first Package our game to create the needed .pak files, we must know the names and the size of the .pak files before creating our Manifest file.
Packaged Project example output
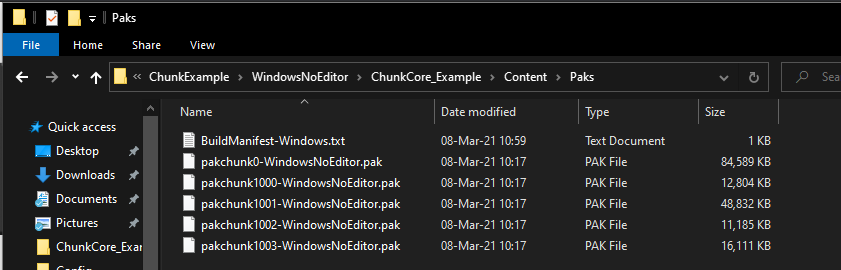
In this example we packaged the ChunkCore_Example project (available on github to download), then we browse into “WindowsNoEditor\CunkCore_Example\Content\Paks” and inside this folder we will find all of our pak files. For example you can see the 1002 file that we created earlier “pakchunk1002-WIndowsNoEditor.pak“.
ManifestUpdater Tool
You can download the ManifestUpdater Tool if you want to use a program rather than a text editor to Create/Update/Maintain your Manifest File.
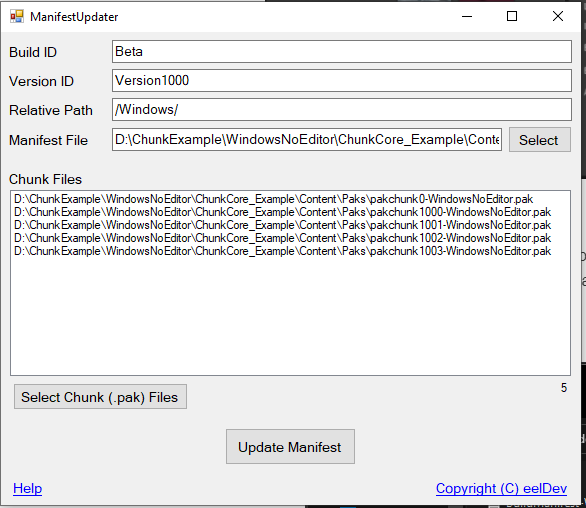
In this example we’re going to be calling our Manifest file: BuildManifest-Windows.txt, here’s a look at what the Example Projects Manifest file looks like:
$NUM_ENTRIES = 5
$BUILD_ID = Beta
pakchunk0-WindowsNoEditor.pak	86618778	Version1000	0	/Windows/pakchunk0-WindowsNoEditor.pak
pakchunk1000-WindowsNoEditor.pak	13111168	Version1000	1000	/Windows/pakchunk1000-WindowsNoEditor.pak
pakchunk1001-WindowsNoEditor.pak	50003840	Version1000	1001	/Windows/pakchunk1001-WindowsNoEditor.pak
pakchunk1002-WindowsNoEditor.pak	11452790	Version1000	1002	/Windows/pakchunk1002-WindowsNoEditor.pak
pakchunk1003-WindowsNoEditor.pak	16497445	Version1000	1003	/Windows/pakchunk1003-WindowsNoEditor.pak
Downloading & Loading Data
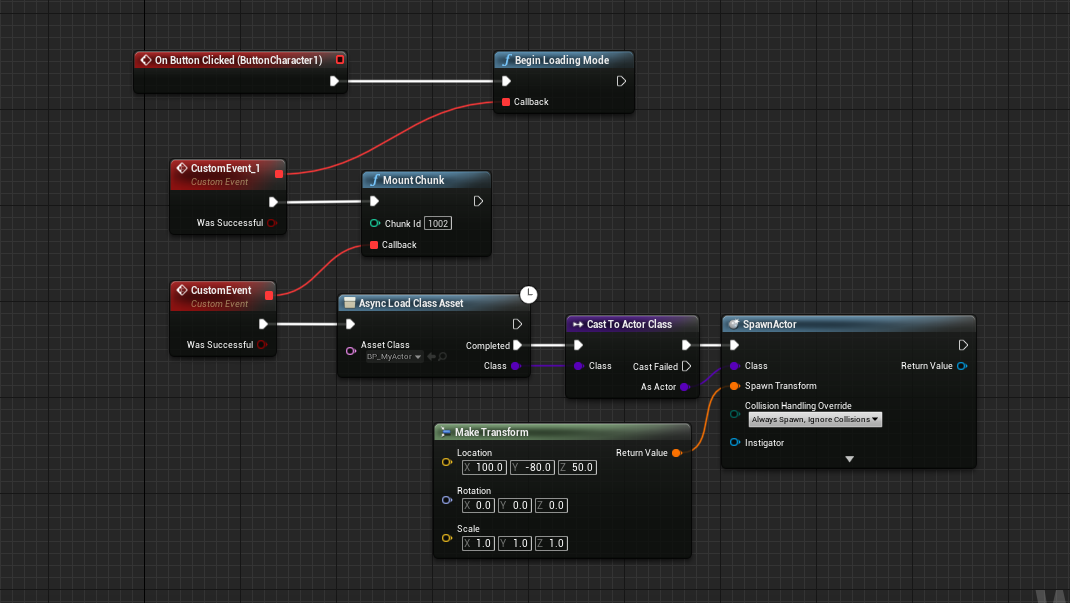
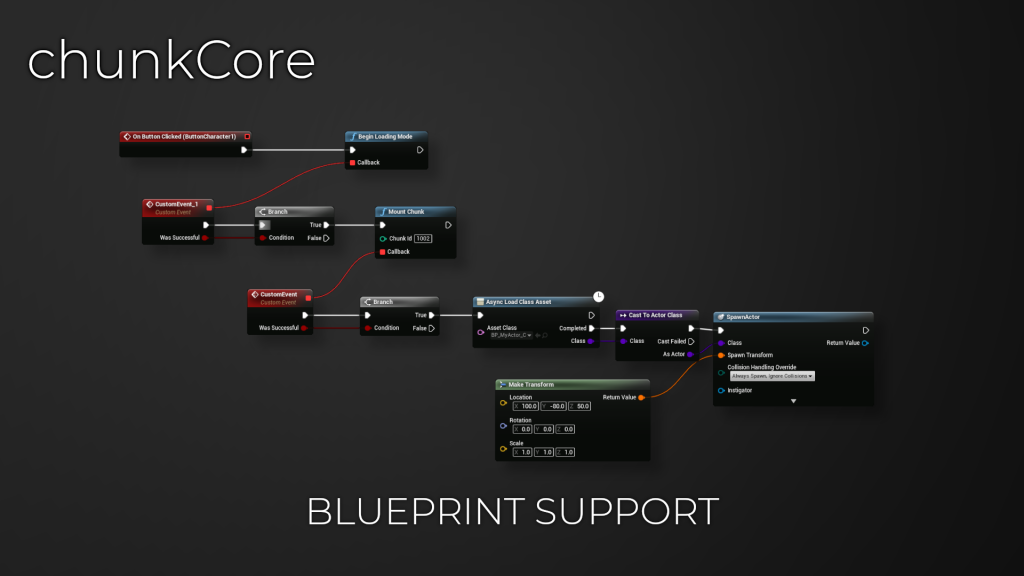
After creating your BuildManifest-Windows.txt manifest file upload the file & all your .pak files to your web server/CDN, here is an example of how to download/mount/load a .pak file using the plugin:
Downloading and spawning our actor
This example will download all the files we previously included in our pak file “1002” and then spawn the BP_MyActor included in that folder. Note that we must also Load the Data with the “AsyncLoadClassAsset” function because all files in the .pak container is not loaded automatically for performance reasons.
You can find this example and a few more in the downloadable Example Project